GatsbyJS is a Javascript framework built upon the ReactJS framework and integrates Webpack with GraphQl, to give you an awesome development experience.
As a beginner, if you are not willing to go through the stress of learning the ReactJS framework or GraphQl, GatsbyJS is a suitable starting point for you. Moreover, it has detailed documentation to transform you from beginner to expert in a short time.
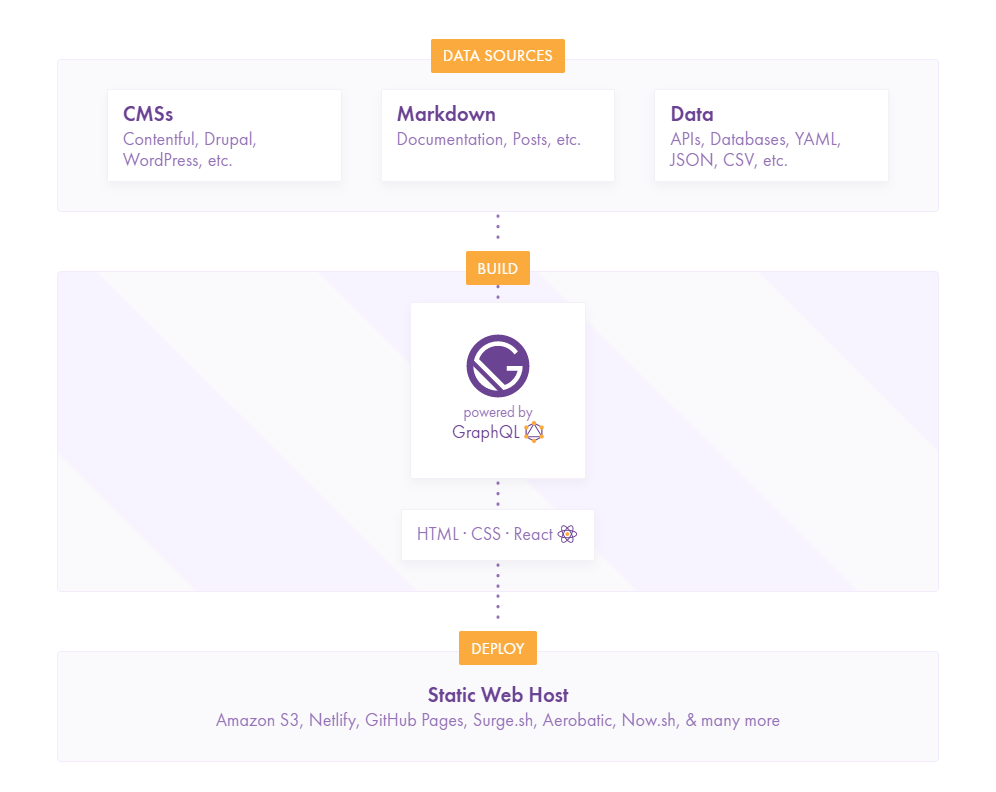
Getting Started With GatsbyJS
Alright, before developing our fancy landing page, I would like to inform you that this guide is a step by step process towards getting our final result and to save time, you’ll also get to see the code used to build the landing page.
Let’s get started.
Installing GatsbyJS
Okay, ready to go down this road with me, let’s prep up to build our landing page. But before that, GatsbyJS requires some files to be set up first. For this tutorial, we would be leveraging on the hello world starter pack from the GatsbyJS GitHub repository.
All that being said, let’s install the required applications to run GatsbyJS, which include NodeJS and Git.
Installing NodeJS
NodeJS is a Javascript runtime environment which executes our Javascript code outside of the browser. Visit the official NodeJS website and download the stable version. Launch the setup file and install.
Great, with Node Js, successfully installed, let’s verify whether it's really active from our command line―I am using windows for this tutorial, so for Mac and Linux users, simply open up your terminal and run.
node --versionHitting your enter key, you should get the version of the Node Js installed and that’s it you have Node Js installed.
Installing Git
Git is a distributed version control system for tracking changes in your code during development.
Alright, with Node Js up and running, let’s install Git. Head to the official Git website and download the latest version. On installation, leave the selected options on default and keep clicking the next button till it installs successfully.
Creating our GatsbyJS Site
With **NodeJS **and Git installed, you are set to create our first GatsbyJS site. As mentioned earlier, you’ll be leveraging on the my-hello-world starter pack to build our landing page.
First things first, open up your terminal or cmd and run:
npx Gatsby Js new my-hello-world-starter https://github.com/Gatsby js/Gatsby Js-starter-hello-worldIt’ll take a while for npx to clone the starter pack from the GatsbyJS repository. After cloning, you may run into an error in your git terminal requesting for your GitHub account details(if you are not signed in), ignore that.
In most cases, your starter file should be saved in your users' folder. For Windows users, check your C:\Users\*username* and you’ll find the starter file as shown below

Working with our GatsbyJS Starter file
Very well, kudos to you for making it this far. Let’s launch our starter pack and start developing.
I will be using visual studio code for this tutorial, I recommend you do the same. Alright, let’s right-click on our “my-hello-world-starter” folder and open with visual studio code.
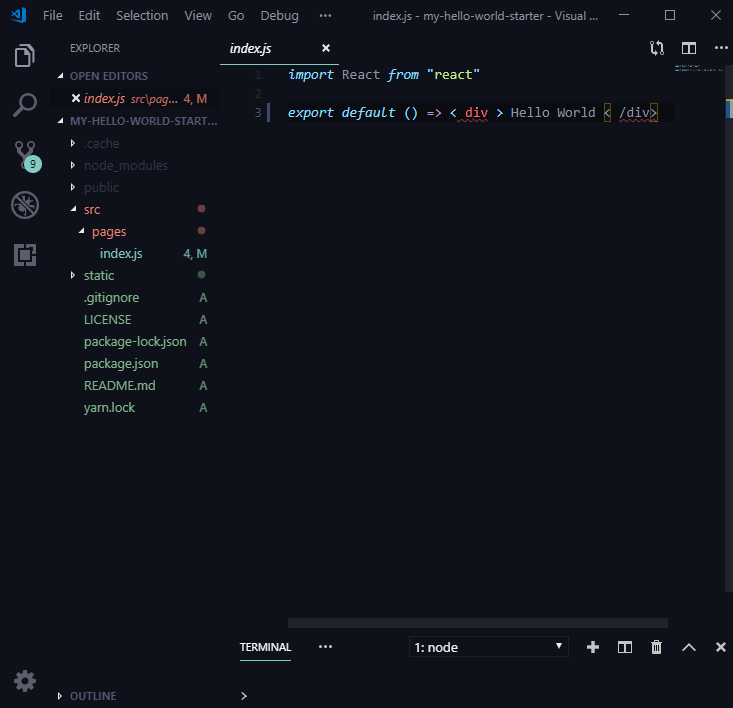 On opening the folder, you should have something similar to mine. Alright, we have our Gatsby Js site ready, but we have no way of viewing it so let’s fix that right now.
Serving Our App
So, let’s run our app to see how it looks like.
We start by opening up our terminal on visual studio code, using the hotkey “Ctrl + `”. With our terminal open, let’s serve our app to run locally on our server.
To serve our app, run npm run develop on successful completion, your terminal looks like this or similar to this:
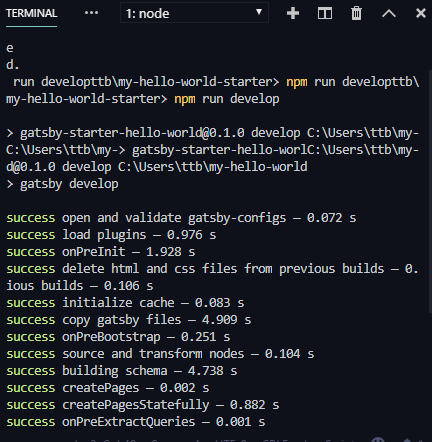
Great, our app is live, let’s view it.
To view your app, head to your favorite browser ― google chrome preferably and enter ‘http://localhost:8000/’ into your address bar. You should get a hello world message on the browser window.
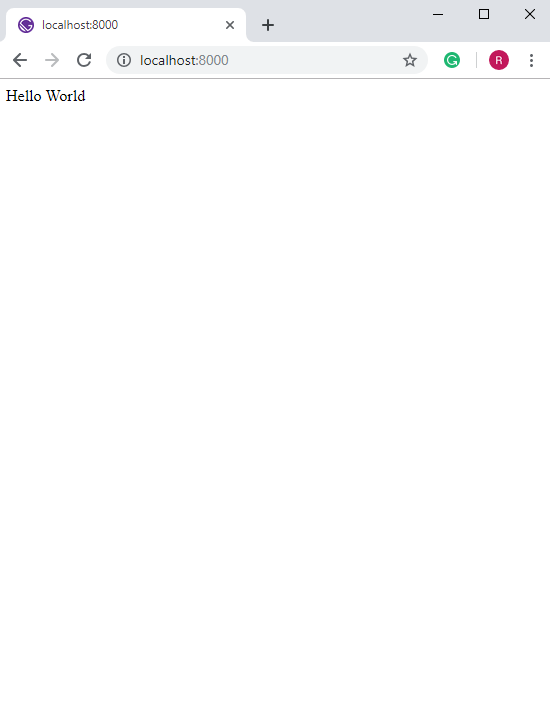
Yeah, pretty simple, our app is up and running with a hello world text on our browser.
Getting to know our files
With our app up and running, let’s examine some folders and files within our starter file before we get started with developing our simple landing page.
We have the node modules folder, public folder, static folder, and src folder.
- The node modules contain all of the modules of code that your project depends on (npm packages) which are all automatically installed.
- The src folder contains all of the code related to what you will see on the front-end of your sites (what you see in the browser) such as your site header or a page template. `src` is a convention for “source code”.
Quick note, if you feel frustrated by the auto-correction in coding syntax such as constantly moving the cursor to another position or moving the HTML angle brackets to a new line, head to the node-modules folder and delete the prettier folder right there and you have full control.
We will be working with our src folder and index.js file to update our front end and for the sake of time, we would be having to build a simple landing page nothing too complex, just some HTML and CSS and of course it's going to look great.
Building The Landing Page
Alright, I believe we all have some fundamental knowledge of HTML and CSS because that’s the little we require to build our landing page. At the end of this tutorial our simple landing page should look just like this:
 Let’s get started with the HTML. To save time I already wrote the necessary codes and styling, so you can just copy and paste in your editor.
Before we get started, let’s head to the src folder, down to pages and index.js file and add a bracket ”()” just after our export default() arrow function ― you should have something like this:
import React from "react"

export default () =>(
   <h1>Hello World</h1>
);
Verified that your code runs fine in your browser, let’s prepare the required CSS files for the page.
For this tutorial, we will be making use of bootstrap CSS, UI kit and a custom CSS file, you can download these files here ensure to copy the index and style CSS files into the pages folder.
Alright, after downloading the file, move it into your pages folder under the src folder.

Up next, let’s link our UI kit CSS file from a CDN. To do this, we head to our public folder and open the index.html file. Locate the head opening and closing tag to then add this HTML code to link our UI kit external stylesheet.
<link href="https://cdn.rawgit.com/creativetimofficial/now-ui-kit/2e8e665f/assets/css/now-ui-kit.min.css?v1.2.0" rel="stylesheet"></code>Successfully added all the required CSS files, we will be working with our index.js file to update our frontend. But first, let’s import the two CSS files we stored in the pages folder under the src folder.
Import './index.css'
Import './style.css'
Add the above import statements directly under your import react statement. Next, we work with the HTML, being efficient, I prepared the HTML codes, so just copy and paste this within the two brackets just after the export default() arrow function.
<div class="index-page sidebar-collapse">
   <div class="wrapper">
       <div class="page-header clear-filter filter-color">
           <div class="page-header-image" data-parallax="true">
       </div>
           <div class="container">
               <div class="content-center brand">
                   <h1 class="h1-seo large">THE BIGGEST DIGITAL ACCESSORIES</h1>
                   <h3 class="h3-seo">Coming Soon!</h3>
                  <button type="button" class="btn btn-primary btn-outline-success" style={{marginTop: "5em", width: "200px", fontSize: "20px"}}>Call To Action</button>
               </div>
           </div>
       </div>
   </div>
</div>
Taking two steps backward, you can check the style.css file and see that we are setting the background image of the page and you can see some other styling right there. Refresh your browser to see the changes take effect and voila you have your landing page up and running.
Conclusion
Gatsby Js makes it easy to build landing pages. It’s quite fast and efficient, saving you lots of time and effort.
In this article, you’ve seen how to set up the requirements for working with Gatsby Js. You’ve also seen how you can build a simple but unique landing page. If you wish, you can make customizations to the whole set up and make a landing page of your own.
Thanks for reading. Questions and contributions are welcomed.
