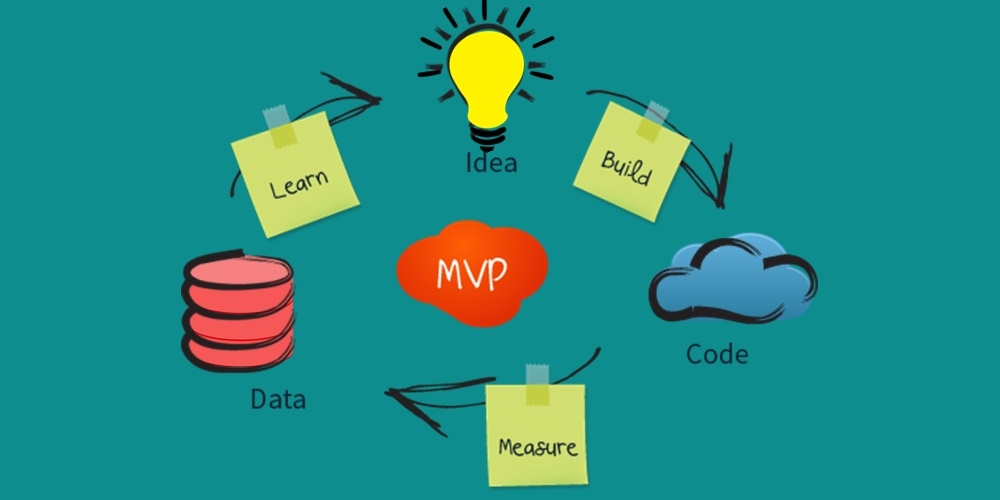
What is MVP? It is a minimum viable product with “enough features to gather validated learning about the product and its continued development” MVP is perfect for checking your idea straight away without spending too much time and money.
How to build your MVP?
Even though MVP is more of a product prototype, it requires a lot of preparation. The whole concept of MVP is testing your idea and determining what would work, therefore, you have to research your target audience, determine its needs and make sure that MVP meets these needs. If everything is done correctly, in the future it would be much easier for you to finalize your product and market it.
Normally, MVP is developed in few steps and we are going to have a look at each one.
Step 1. Research your market

Your idea may be awesome (as you think) but sometimes it just does not fit the market needs. Therefore, before starting any big work (like budget and time planning), first make sure that people will be interested in your product. You can even conduct surveys – the more information you have, the bigger are your chances to succeed. As well do not forget about your competition – what do they offer and how can you stand out?
Step 2. Define your idea

The most important question is: what value does your product have for the user? How can it improve their lives and why would they want to use it?
At this point, you should have clear idea in your mind concerning the primary values of your product. Since MVP is all about introducing these values to people, first outline them and then develop your MVP based on them.
Step 3. Think about process design
Determine exact steps that the user needs to fulfill, in other words: describe how the client will use the app, starting from step 1 – opening the app and ending with the final step (purchase, delivery, etc.). Thinking about user flow is important as it helps you not to miss anything and make sure that your user stays satisfied. Also, don’t forget to name the steps of the flow, it will make further work much easier.
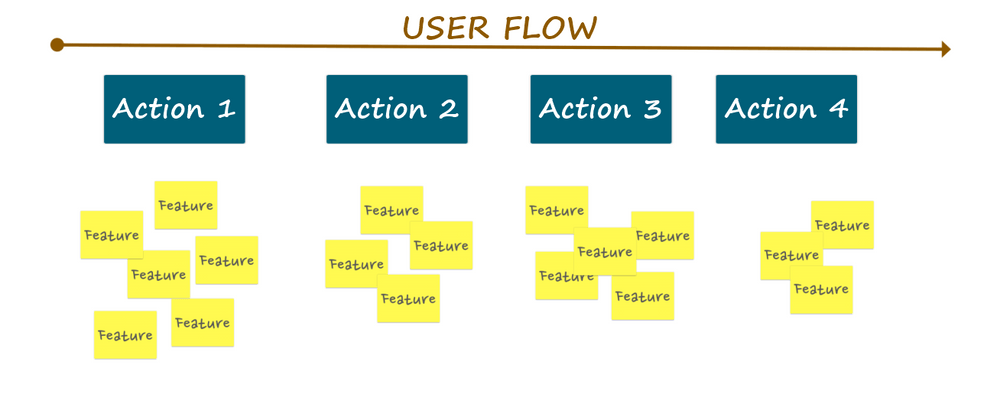
Step 4. List the project features
First things first, sit down and list all the features that you want to see in your product. Don’t be shy and put there everything that you wish, the list has to be a full and perfect vision of a product.
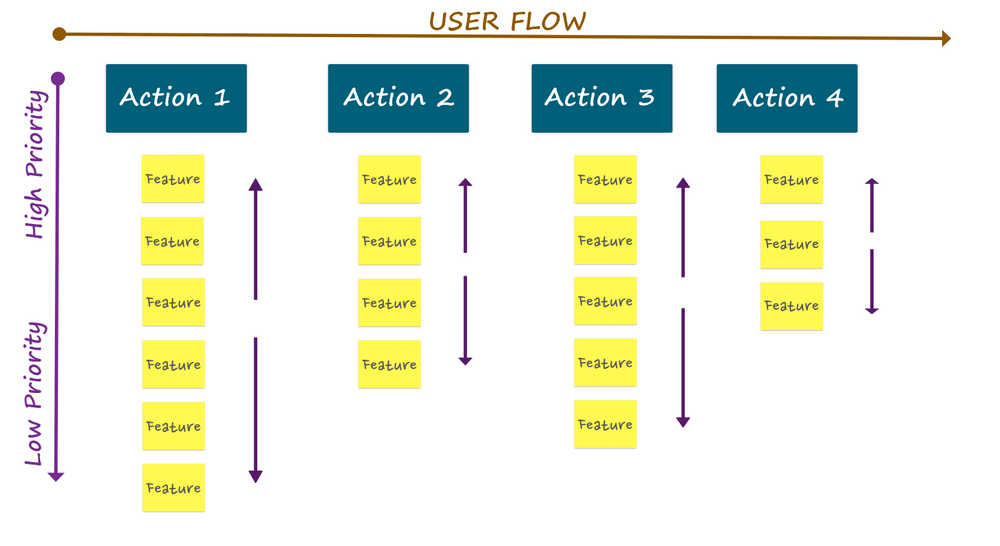
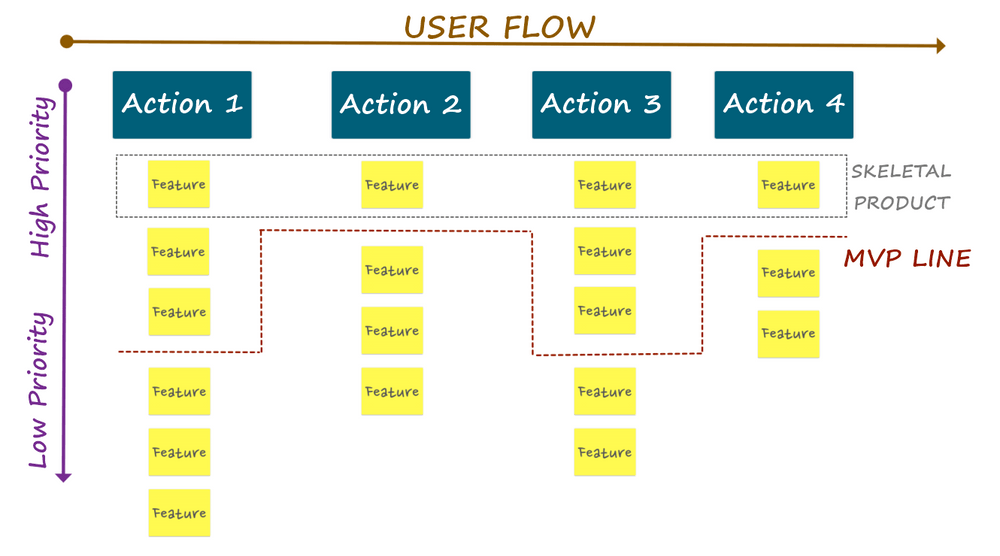
Now, since you are developing an MVP, take a look at the list again and cross out all the features that are not of primary importance. MVP means you will have the right amount of features to test and use the product but with no additional features included (meaning, fancy design or add-ons can wait).
At this point it is important not to get carried away and prioritize your features, focusing on essential ones.
Step 5. Build your MVP
Once you’ve determined key features and learnt about market needs, you can assemble your MVP. Remember, that prototype does not mean bad or average quality. Your product still has to satisfy the user. Thus, it has to be easy to use, appealing and most importantly, fit the main user needs.
Step 6. Analyze and repeat
After launching your MVP, analyze everything, from user responses to the product itself (whether it is really competitive, how well it was accepted by the market). At this point, feedback from the users is your key to success. It will help you determine which features to add next, whether your product will become popular, etc
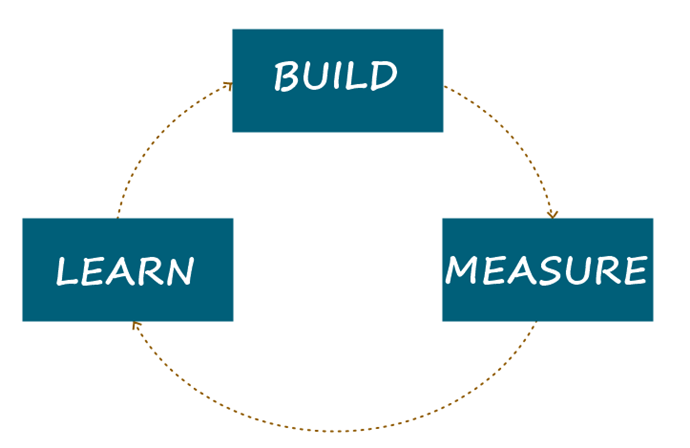 When building MVP, always keep in mind: do not over-complicate it and listen to your user. You are developing this product for them, so instead of going with your intuition, don’t be afraid to ask people what they want and give it to them.
DashBouquet offers MVP for fixed price. This option fits perfectly for startups, when it is necessary to test your hypothesis and learn about your potential users’ habits to make a decision. We think that developing a minimum viable product is an important step in the process of building your app. Our MVP calculator tool shows provisional cost of your app. Check our page for MVP, where you can estimate your idea.
