We will create an MVP of an app on React that will receive push notifications by using Firebase Cloud Messaging (even in the background mode or when the app is closed). This is an easy thing to do but there are certain moments to watch for. You can find all the needed keys/tokens described below in the Firebase settings of the project.
Adding manifest.json
Add manifest.json file to the folder that already has index.html with gcm_sender_id. If you already have the manifesto, simply add this line. Insert the value below AS IT IS, without changing anything.
{
	"gcm_sender_id": "103953800507"
}
Connect manifesto in index.html; href may differ.
<head>
	<link rel="manifest" href="%PUBLIC_URL%/manifest.json" />
</head>
To make sure that everything is working correctly we need to open Browser's devtools panel and navigate to Network tab, be sure that manifest.json was loaded by your application and it contains gcm_sender_id.

Setting up service worker for receiving messages
Create a public/firebase-messaging-sw.js file. This is a future service worker that will be receiving the messages in the background mode. setBackgroundMessageHandler is responsible for that. In the piece of code below you can see the event handler by a click on the tooltip message ...addEventListener('notificationclick... if the tab is not active or closed.
importScripts("https://www.gstatic.com/firebasejs/5.9.4/firebase-app.js");
importScripts("https://www.gstatic.com/firebasejs/5.9.4/firebase-messaging.js");

firebase.initializeApp({
	// Project Settings => Add Firebase to your web app
  messagingSenderId: "1062407524656"
});

const messaging = firebase.messaging();

messaging.setBackgroundMessageHandler(function(payload) {
  const promiseChain = clients
    .matchAll({
      type: "window",
      includeUncontrolled: true
    })
    .then(windowClients => {
      for (let i = 0; i < windowClients.length; i++) {
        const windowClient = windowClients[i];
        windowClient.postMessage(payload);
      }
    })
    .then(() => {
      return registration.showNotification("my notification title");
    });
  return promiseChain;
});

self.addEventListener('notificationclick', function(event) {
  // do what you want
  // ...
});
In order for the worker to start working, you have to register it from the beginning. I did it right before the app entry point. Official documentation suggests to register the FCM worker in a slightly different way but, depending on the webpack settings, you may get an incorrect mime-type error upon worker uploading. Below is the most reliable method in my opinion.
import ReactDOM from "react-dom";
import App from "./App";

if ("serviceWorker" in navigator) {
  navigator.serviceWorker
    .register("./firebase-messaging-sw.js")
    .then(function(registration) {
      console.log("Registration successful, scope is:", registration.scope);
    })
    .catch(function(err) {
      console.log("Service worker registration failed, error:", err);
    });
}

ReactDOM.render(, document.getElementById("root"));
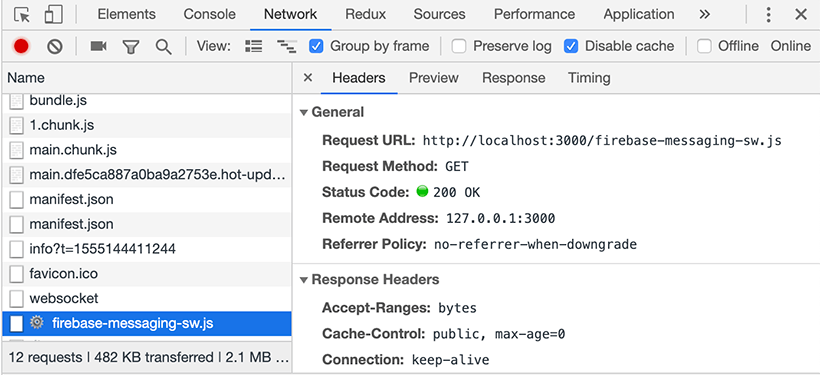
Ensure that worker loaded with no errors.
And that browser registered it.
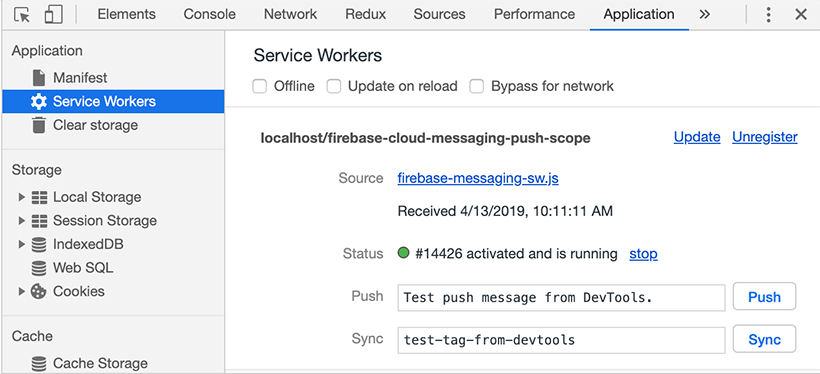
Check the browser console for any manifesto or service worker errors and fix them, if there are any.
Setting up the Firebase SDK
yarn add firebase
# or
npm install firebase
Connecting Firebase Cloud Messaging
Create a src/init-fcm.js file where you will initialize the FCM. In the comments below you can see where to get the keys.
import * as firebase from "firebase/app";
import "firebase/messaging";

const initializedFirebaseApp = firebase.initializeApp({
	// Project Settings => Add Firebase to your web app
  messagingSenderId: "106240...4524656"
});

const messaging = initializedFirebaseApp.messaging();

messaging.usePublicVapidKey(
	// Project Settings => Cloud Messaging => Web Push certificates
  "BD6n7ebJqtOxaBS8M7xtBwSxgeZwX1gdS...6HkTM-cpLm8007IAzz...QoIajea2WnP8rP-ytiqlsj4AcNNeQcbes"
);

export { messaging };
Now connect everything that you did to React component. The most important actions here take place in the lifecycle method componentDidMount. Remember that it’s an MVP and in a real project, you can allocate everything to different places.
// ...
import { messaging } from "./init-fcm";

// ...
async componentDidMount() {
  messaging.requestPermission()
    .then(async function() {
			const token = await messaging.getToken();
    })
    .catch(function(err) {
      console.log("Unable to get permission to notify.", err);
    });

  navigator.serviceWorker.addEventListener("message", (message) => console.log(message));
}
In order for the service to start sending us messages, we should let it know the address of our app. For that, we need to get a token and pass it to the server. With the help of this token, the server will know the address that we registered by.
To get the token, we have to allow the browser to receive push messages. In this case messaging..requestPermission() will show the following on the loading page:
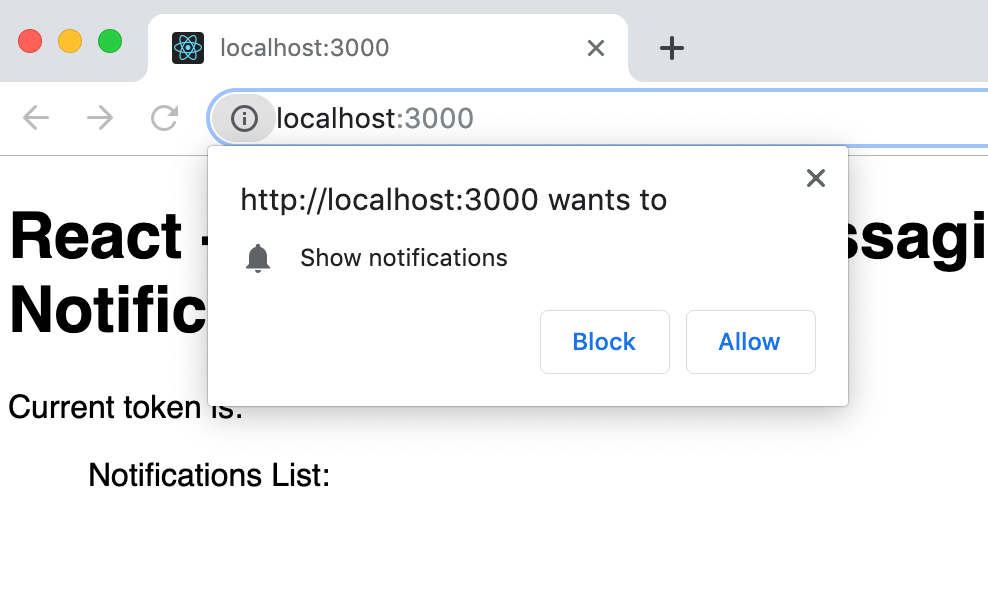
You can always change this configuration:
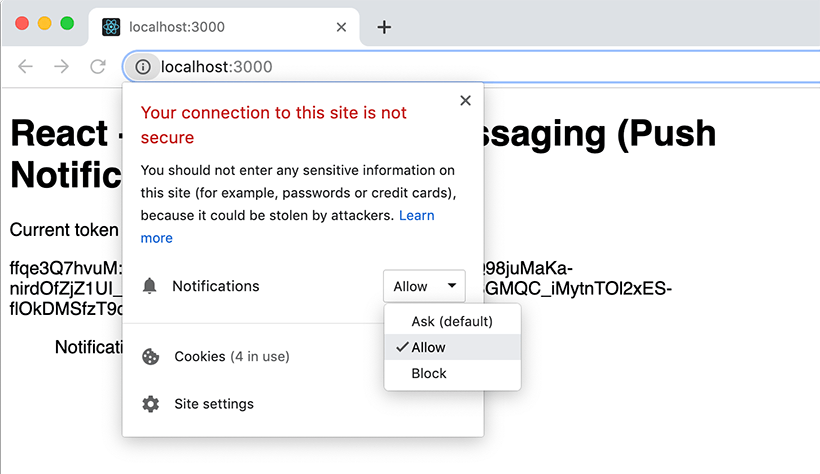
Only after the permission described above, messaging.getToken() can get the token.
In order to receive the messages, we have to install the handler on onMessage. Official documentation suggests the following method:
messaging.onMessage((payload) => console.log('Message received. ', payload));This method works only if the tab with the app is in focus. We will put the handler right on the client in the service worker. Depending on the tab focus, message will be having a different structure.
navigator.serviceWorker.addEventListener("message", (message) => console.log(message));If you are a bit confused by now:
- Set up a JavaScript Firebase Cloud Messaging client app - official documentation with a step-by-step guide. It describes the logic of token update very well. We will skip it though to save the size of the article.
Sending and receiving messages
We will use the Postman app for that.
1. Set up the query titles. Authorization title in the form key=<SERVER_KEY>. The key for the sender (server) is in the project settings Settings ⇒ Cloud Messaging ⇒ Server key.
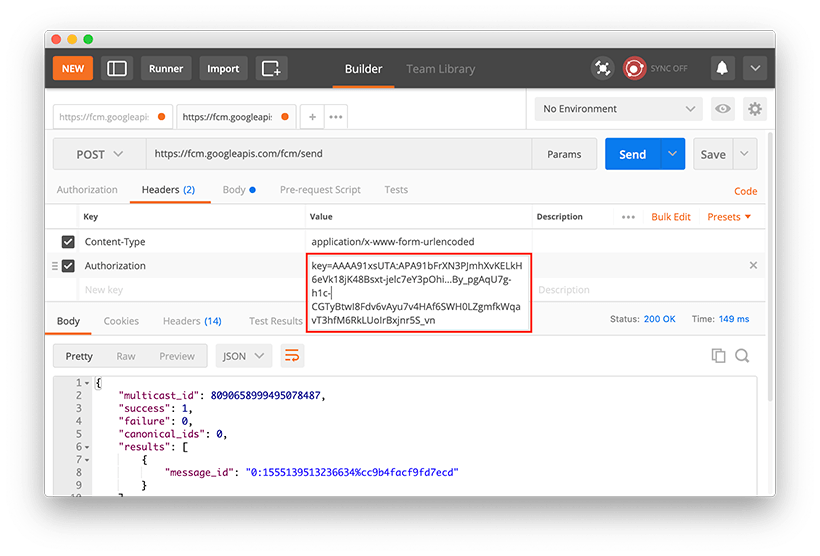
2. Setting up the query body
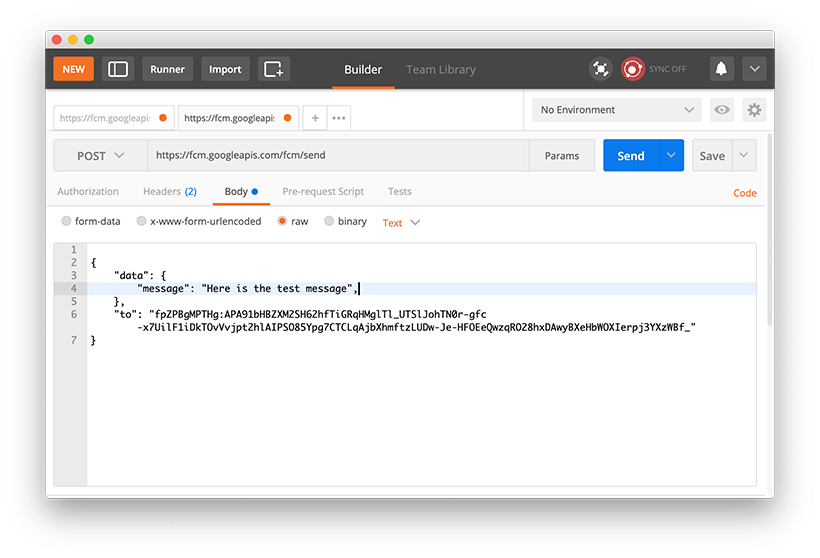
In the "to:" field: use the previously obtained token from messaging.getToken(). For data transfer, we will use the "data" field that can have any nesting. As well, check out the official documentation on writing the query structure. There are a few query types and browsers proceed them differently. In my opinion, the "data" query is the most universal one. Then simply click the Send button and in the browser, receive the previously sent information.
The end
The code in this article serves for demonstration purposes. The project is here ⇒ react-fcm. Don’t forget to insert the keys from your project before starting.
